I don’t know about you, but I wear my jeans until the bitter end. I’ll always donate clothes that don’t fit, but when there’s just a little rip here or there, I’ll keep them for a dirty work day instead. I call them my dog jeans, because even though I can’t wear them in public, the dogs never care how tattered I look. They’ll greet me with muddy paws no matter what I’m wearing – and I embrace that!
When I cleaned out my closet the other day, though, the mound of dog jeans was three times the size of my decent-enough-for-public pile! I can’t just throw them away… what a waste… so I decided I’d try to make some use out of them.
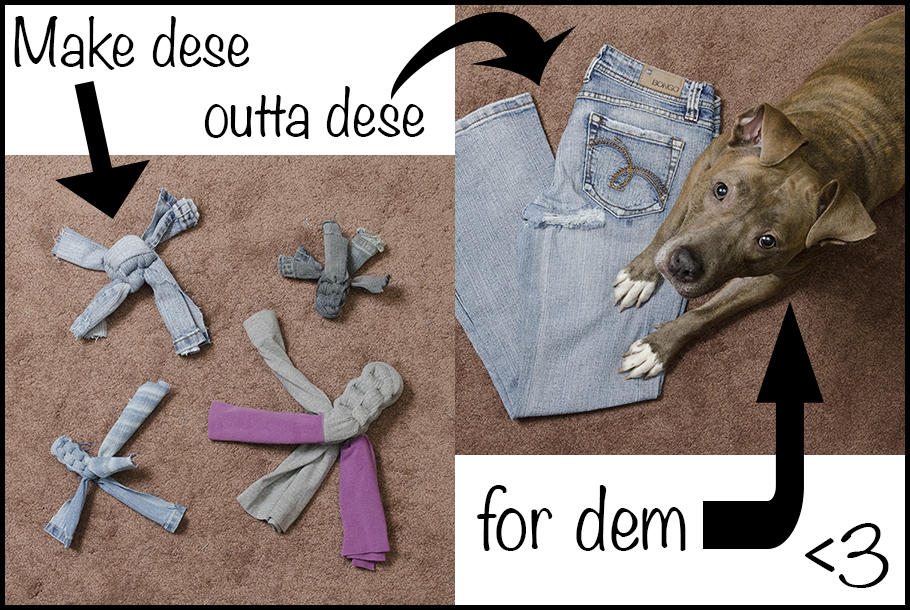
I was inspired by the lanyard weaving technique I learned as a counselor-in-training at a summer camp way back when. I made keychains, bracelets, and, eventually, toys for my parrot out of lanyard. So I figured why not do the same thing on a bigger, stronger scale? I give you upcycled tug toys for dogs!
Here’s How to Do it Yourself:
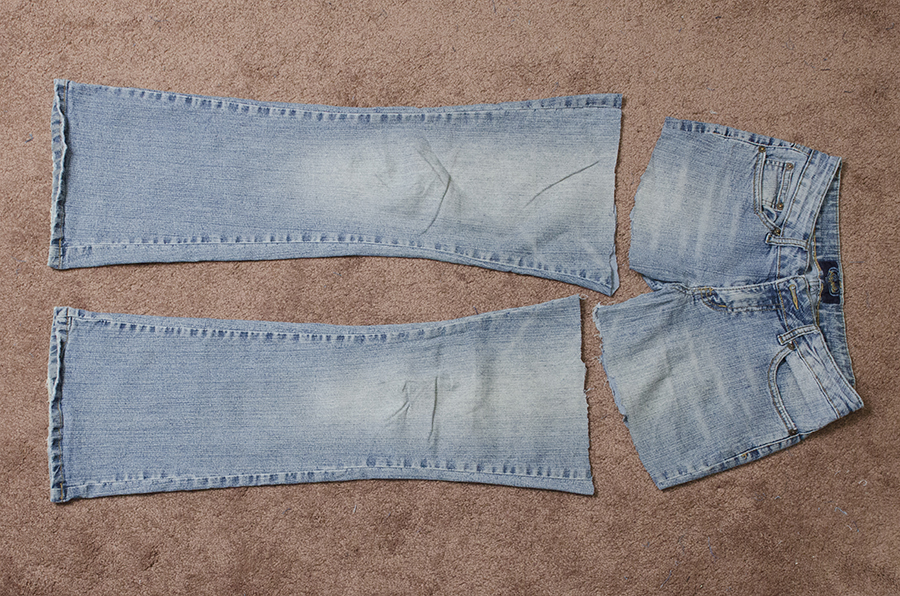
Start off by cutting the legs off of your jeans. You can cut higher if you want, but you should definitely avoid any metal embellishments that might damage doggie’s teeth. I was trying to preserve the back pockets for another project that is yet to be determined.
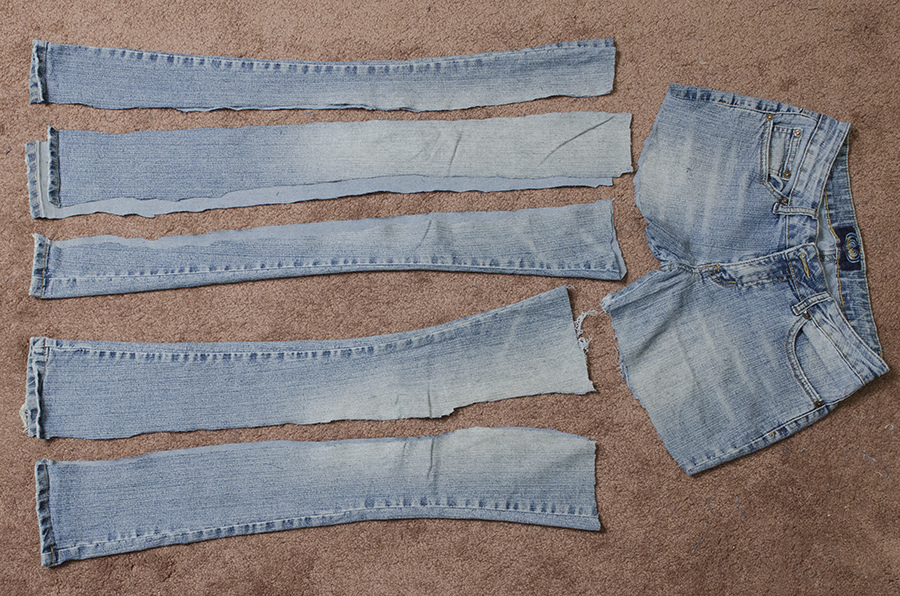
Now cut the legs into long strips. As you’ll see later on, the width and length of your strips will affect how large or small your toy comes out. I would use thicker pieces for big dogs and thinner ones for small dogs.
The top pant leg is cut into four strips and will make two small toys. The bottom leg will make one large toy out of those two pieces. For extra strength, I keep the seams in the middle of my strips, if possible.
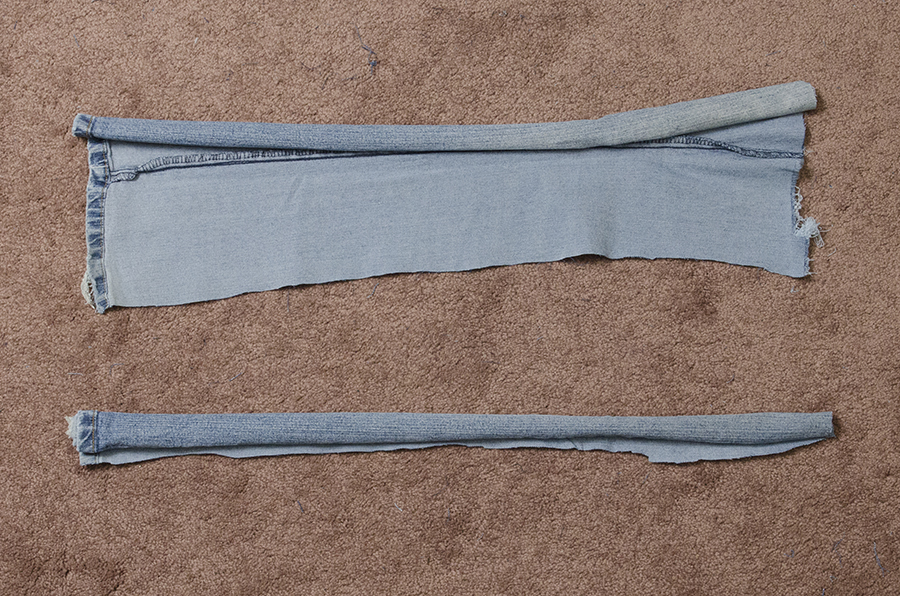
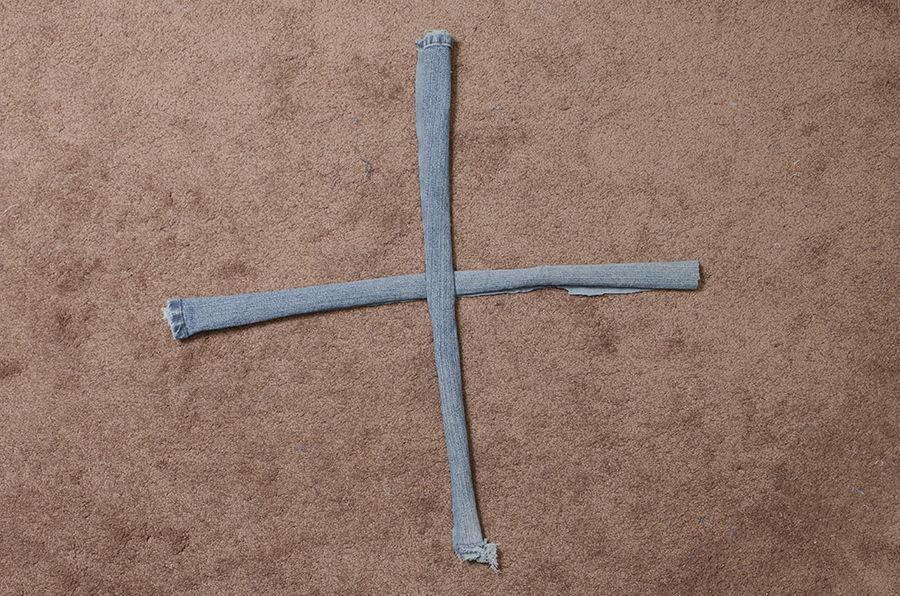
Roll up two strips of equal length and width.
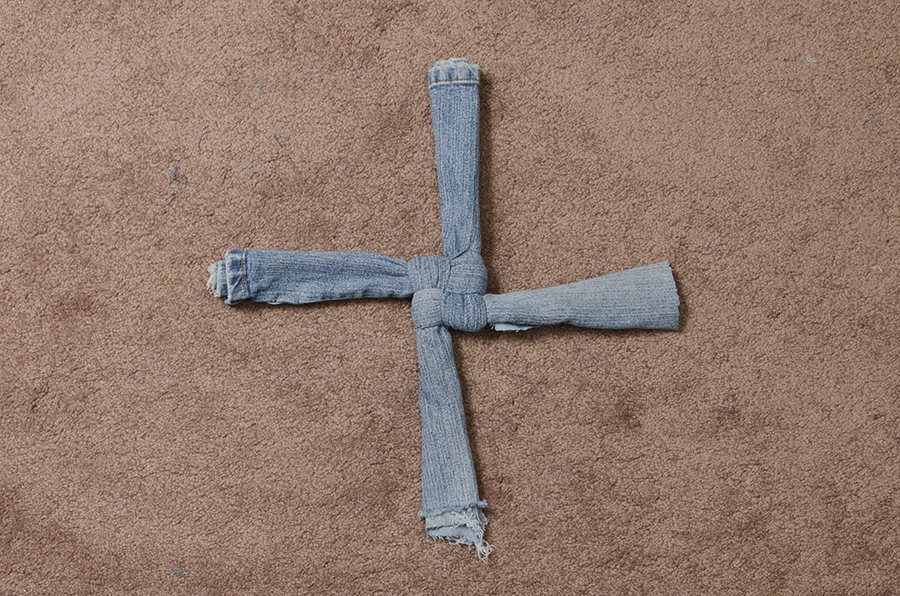
Simply criss-cross your two rolled up pieces.
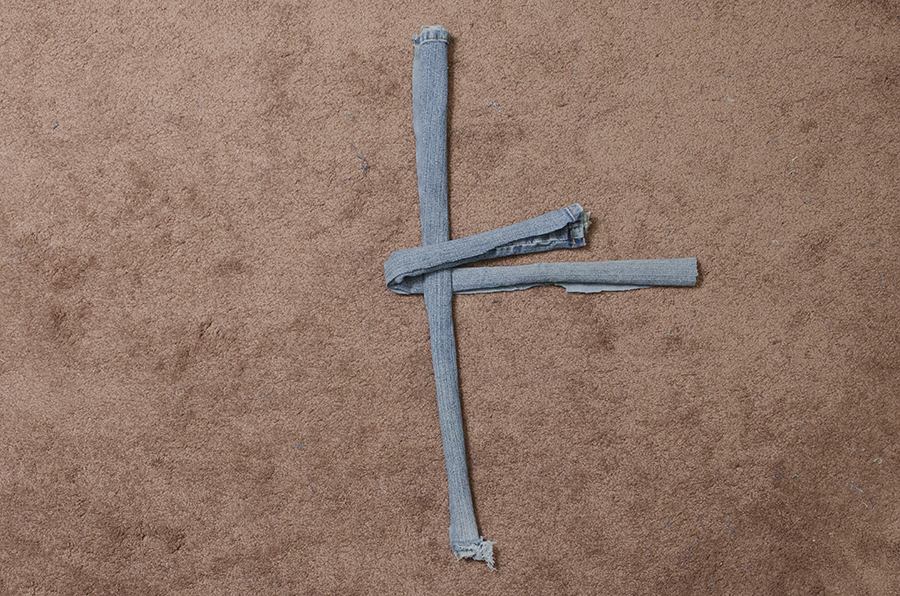
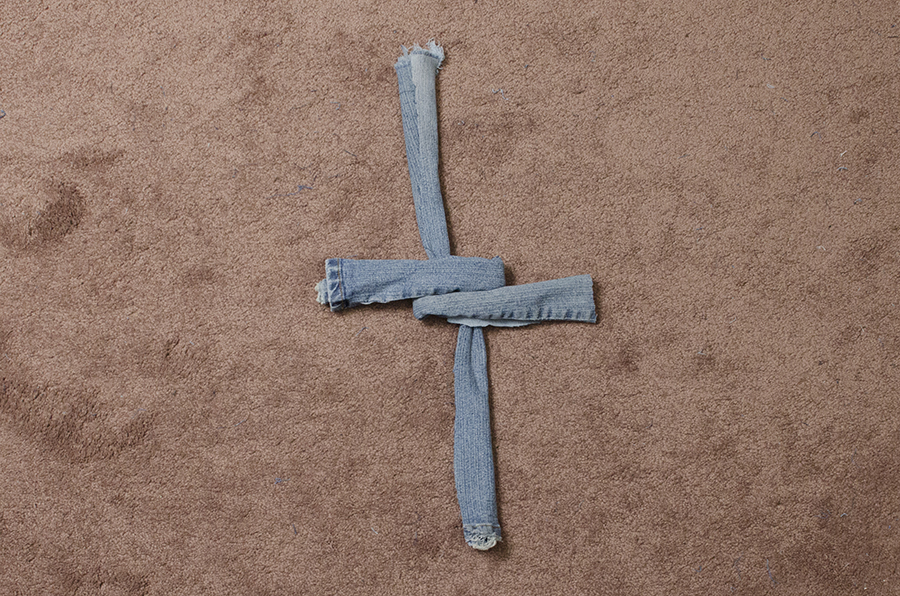
Bring one end of the bottom strip up and cross over the top strip.
Do the same thing with the other end of the bottom strip.
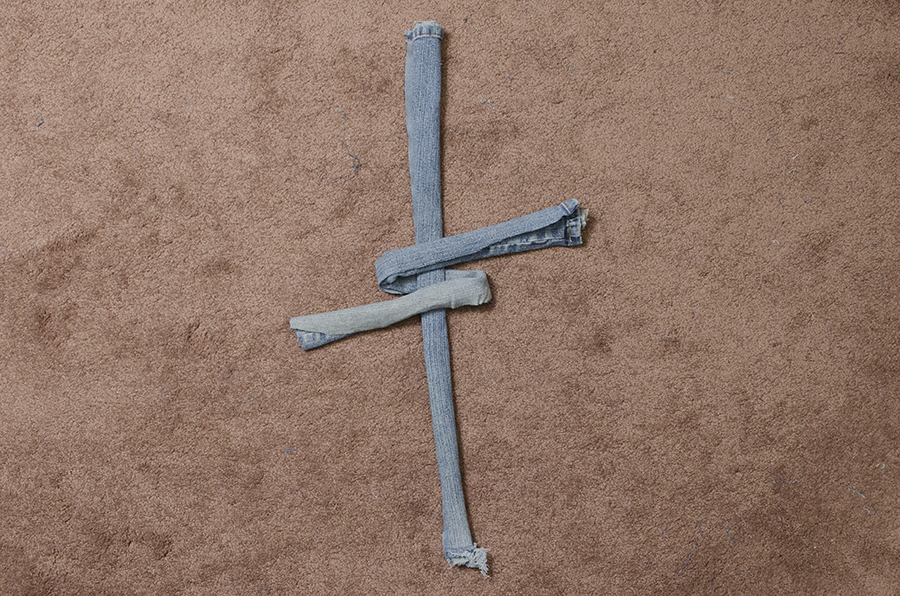
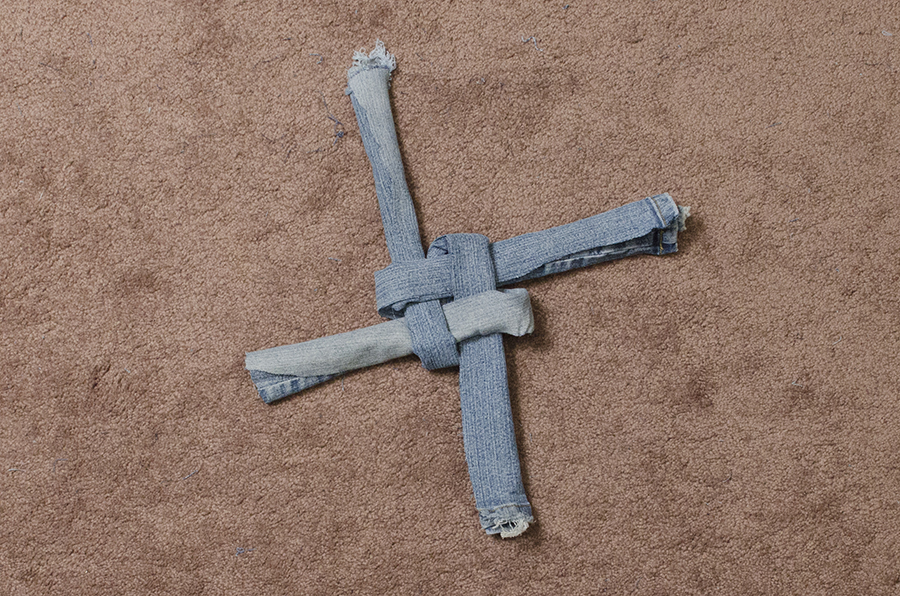
Now it starts to get a little tricky. Bring the strip that’s pointing downwards up and over the piece you folded over in the last step, and then underneath the piece you folded over in the step before that.
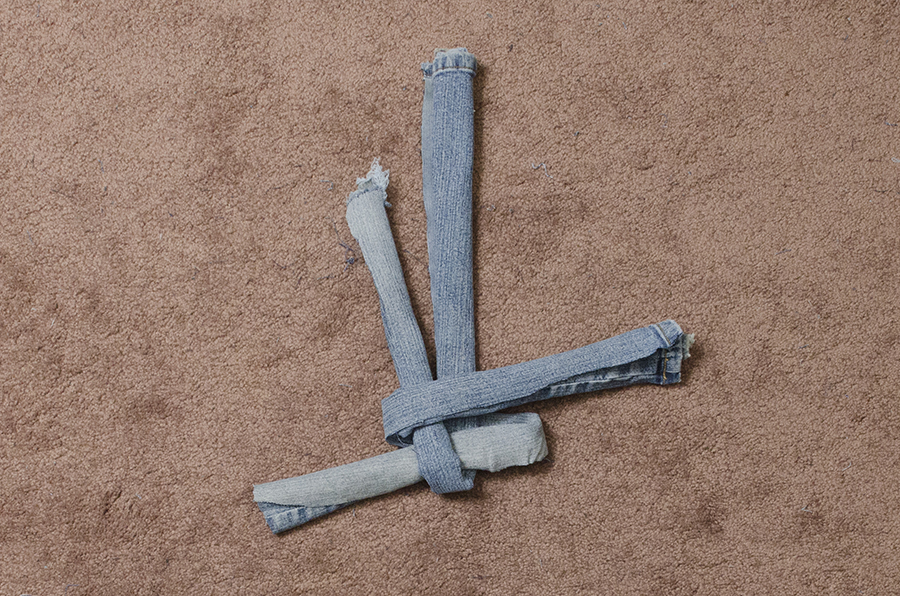
Do the same thing with the other end of the strip that is pointing upwards – weave it back down, first over, then under and out. This is what it should look like after your first round of weaving.
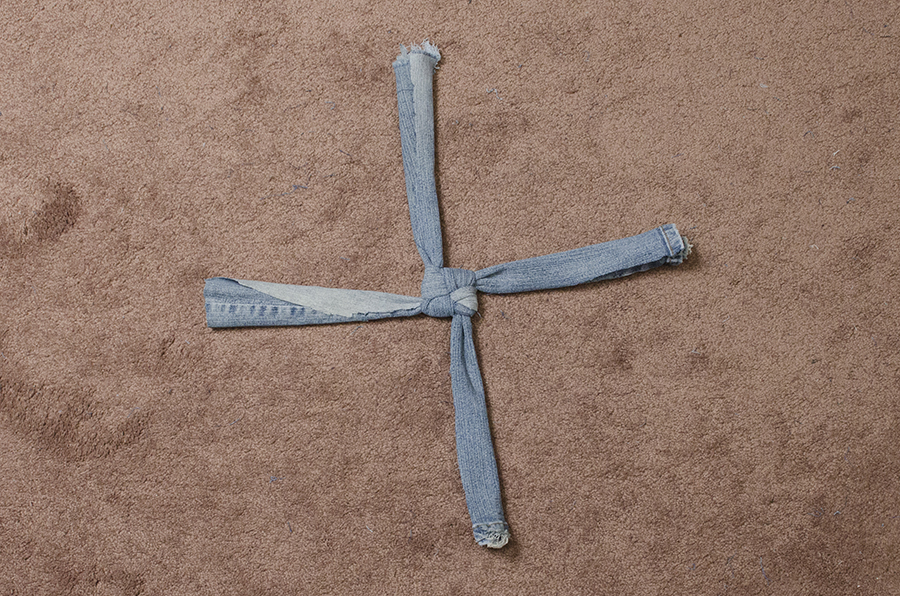
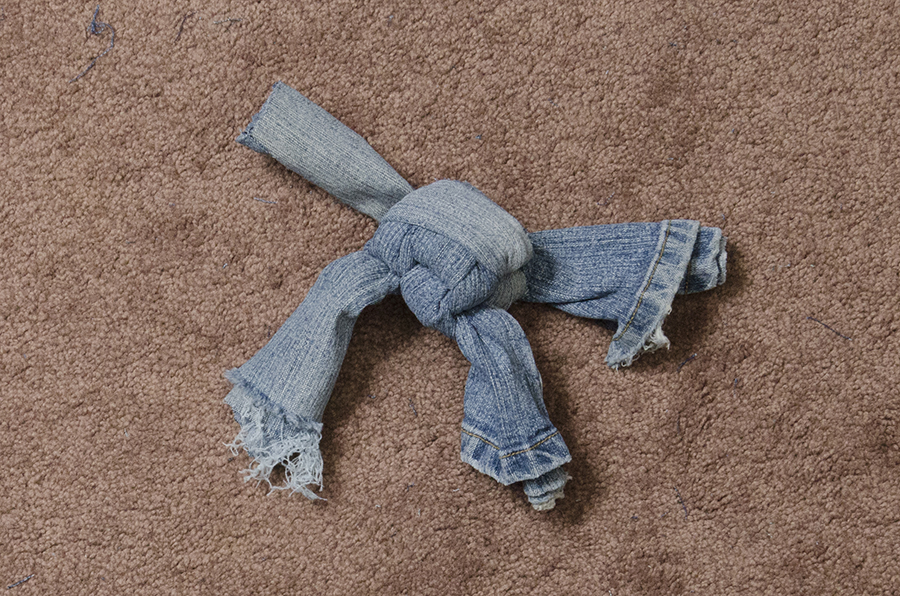
Now you want to tighten the whole thing up. At first, I pull all four ends at once. Then, to get it even tighter, while holding the center knot, I tug on each strip as hard as I can.
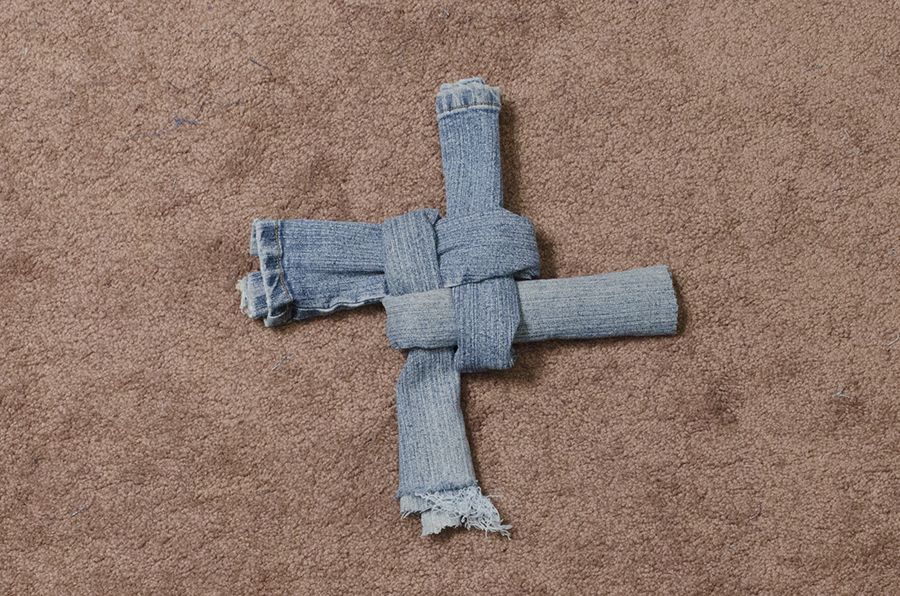
Then start all over again. Fold the left and right ends back over the knot.
Weave the top and bottom ends back into them.
Tighten and repeat until the ends get too short.
I’m only 5’2, so when I’m using wide pieces that are rather short, I only get three stitches in my big dog toy. It’s a thick, strong, knot though, and it holds up for awhile when my Gracie Lou gets at it (she’s a 50 lb pit bull).
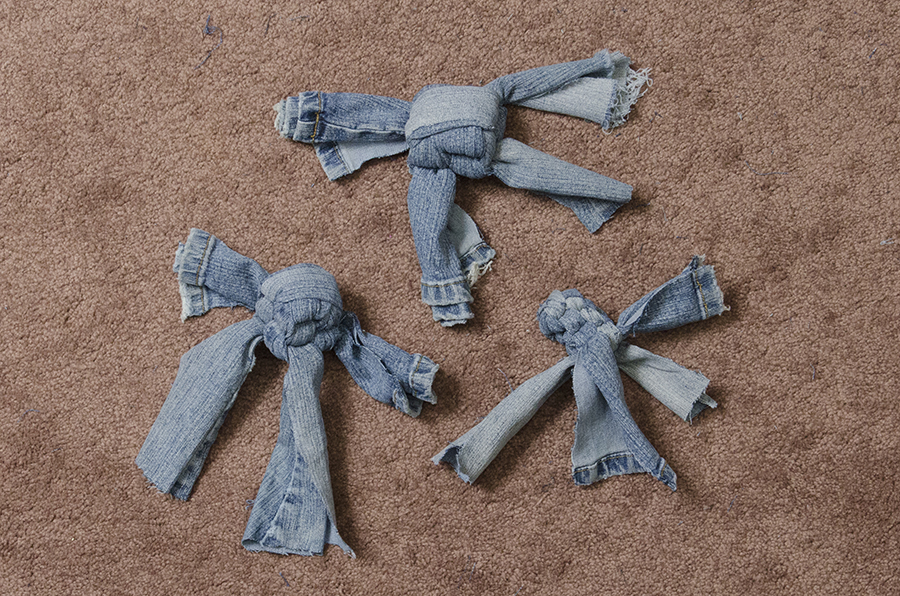
Here are the three toys I made out of the strips that were cut above. The top toy came from the two thick strips cut out of the bottom pant leg in the second step. The one on the bottom left came from the two thicker strips (the ones with the seams in them) cut out of the top pant leg. The little toy on the right came from those two thin, center pieces that were cut out of the top pant leg as well.
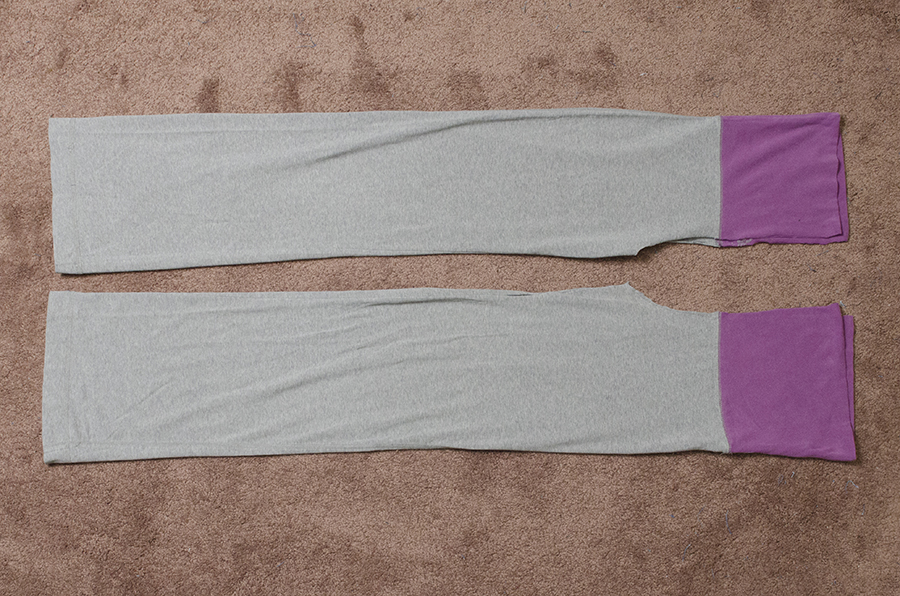
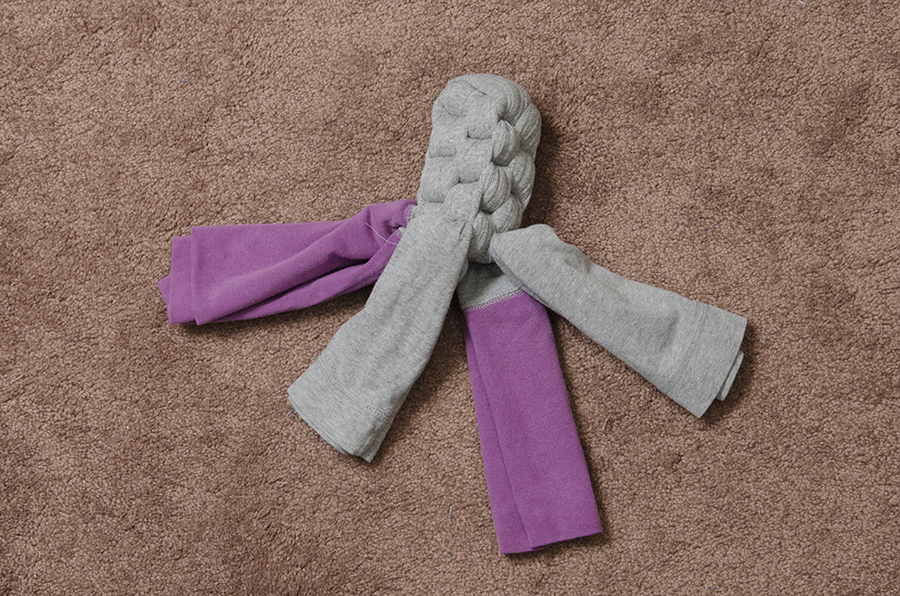
I love using yoga pants to make these toys too! The fold-over flap gives this shorty some extra length to work with, and because the material is so thin and stretchy, I just cut them in half instead of making thinner strips.
I only got one toy out of these, but it’s one large and durable toy. It’s kinda pretty too, don’t you think?
These will make great toys for your own dogs, or you can donate them to your local rescue to sell at their next event for a bit of fundraising. That’s what I’m going to do with my pile of doggie toys, after Gracie makes her picks of course!




What a great idea! Simple, durable, and effective. How clever. Thanks for this! I’ll share this around my social circles. 🙂
Thanks Jeanne! I appreciate the sharing! I’ll have simple/cheap DIY bird toys at some point too, just have to find the time to photograph the process. Thanks again =)
This idea is fabulous!! I bring my life skills class to a rescue center in the area twice a year. We donate food, treats and blankets. I think we could make these to bring with us. Thank you for this idea. 🙂
Yay! I’m so glad you think so! It’s so simple and such a great way to use clothes that are too far gone to donate… I dunno about you, but I wear my clothes to death lol. Thanks for taking the time to comment Trish!
Hi, your ideas are great. We have lot of old jeans ’cause I also sew banadas with them. I will try your DIY now with one of them 🙂 .
Regards from Germany!
Nice! Let me know how they turn out!